Features
Let your client design and approve the border
Send your client one link. They pick a border style, colors and wording on their phone, then approve it, and the design is saved straight onto your event.
The problem
Every custom border starts with a round of emails. You send a mockup, the client asks for a different color, you fix the date, they spot a misspelled name a week later, and you are never quite sure which version they signed off on. Photo booth client design approval by email is slow, and a typo found at the event costs a whole sheet.
What you want is for the client to make the choices themselves, see exactly what will print, and give a clear yes that you can point to.
How photo booth client design approval works in Punchframe
Each event can have a client design link. You create it from the event page and send it to your client however you like. The client opens it on their phone or computer. There is no account to create. You can try client design links on the free Demo plan, and they are included in the Business plan.
The client picks the event type and a style
The link opens a short guided flow titled "Design your keepsake keychains", marked as prepared by your business. The client first chooses Wedding or Corporate, then picks a border style. Each style is shown on a sample photo so they can see how the border sits around a guest's picture. They can also choose no border at all.
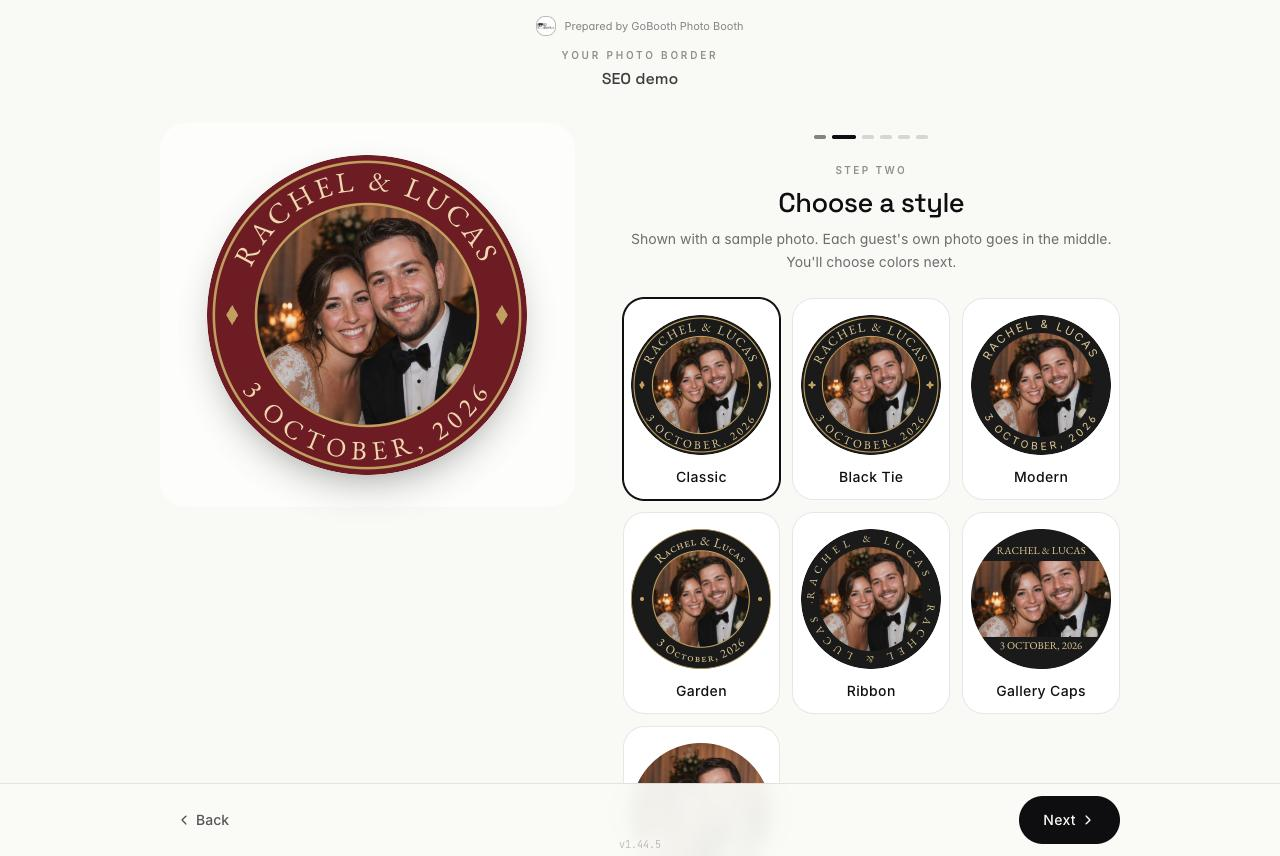
They choose colors and add their words
Next the client picks the border color. You control this part: you can let them choose from the colors you offer, add your own custom colors, or fix one color for them. If you sell keychains with different strap colors, the client can choose to match the border to each strap. Then they type the text for the top and bottom of the border, such as names and a date. For two-sided keychains there is also a step to decide what goes on the back.
They review and approve
The last step shows a summary of the design. When the client taps Approve design, they are asked to confirm that they have checked the spelling of the names and date before they can send it. Their progress is saved as they go, so they can leave and come back before approving.
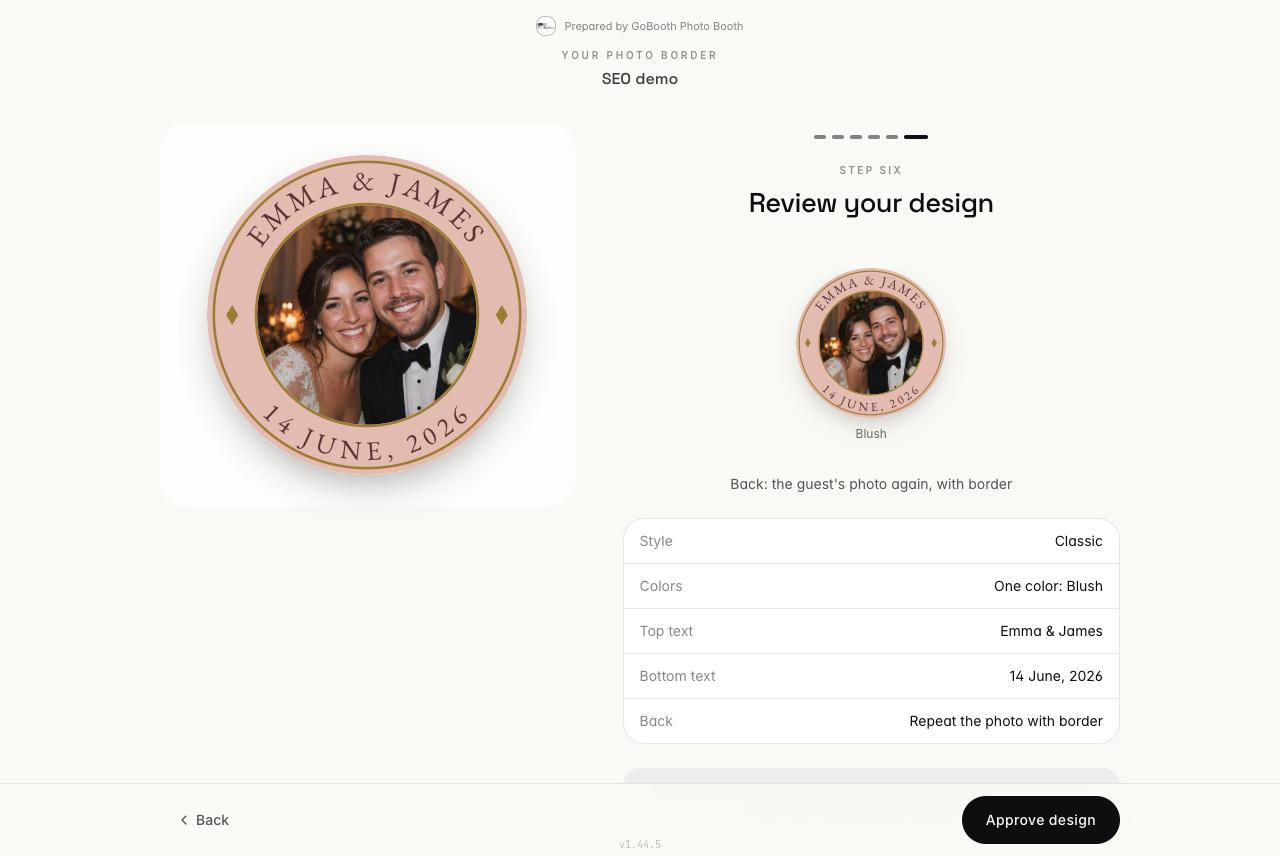
The approved design lands on your event
On approval Punchframe builds the border for each chosen color and saves it onto your event, including the guest portal. In your client link panel you see the status, the date it was approved and a summary of the style and text. Once approved, the design is locked. If the client needs a change, they can reopen it from their link, or you can reopen it from your event page, and they edit and approve again. The current design stays in place until they do.
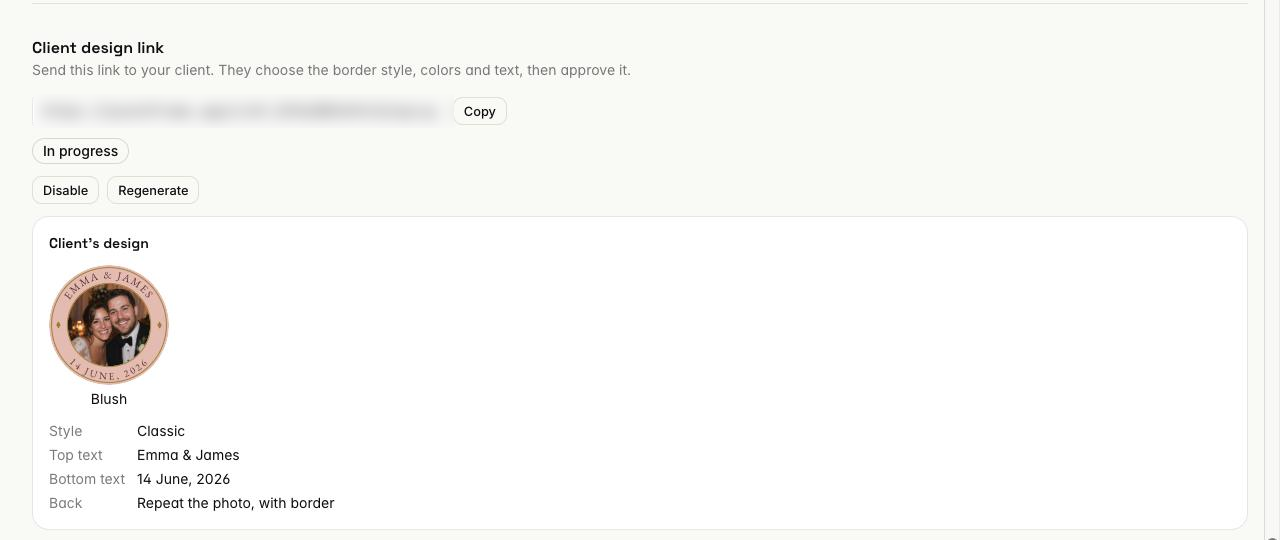
You keep control of the link
You can copy the link, disable it so it no longer opens, or regenerate it so the old link stops working.
Who it's for
Client design links suit any booking where the client cares about the wording and colors:
- Wedding photo booths
- Corporate event activations
- Bar and bat mitzvahs
- Trade-show booths
- Party favor businesses
- Brand pop-ups
Questions
Does my client need a Punchframe account to approve a design?
No. They open the link you send and work through the steps in their browser.
Can the client change the design after approving it?
Yes. An approved design is locked so it cannot change by accident, but the client can reopen it from their link to make changes, then approve again. You can also reopen it from your event page.
Can I limit which border colors my client can choose?
Yes. Before you send the link you choose which colors to offer, add custom colors with your own names, or set one fixed color.
How do I know the client checked the names and date?
The final Approve and send button stays off until the client ticks a box confirming they checked the spelling of the names and date. The approval date is then shown on your event.